Exercise 1: Log into gitlab, set up your SSH key
Objective
Get your account ready for you to use it.
Introduction
Before you can make use of your gitlab account, there are a few things you should do to make it more useful:
- create a Personal Access Token
- this is mandatory on gitlab.ebi.ac.uk because of 2FA, but it also works on gitlab.com
- upload your SSH key (optional)
- configure email notifications (optional)
Create a Personal Access Token
With 2FA, you can’t use your normal password to authenticate a git push, instead you need to use a Personal Access Token, which you create in the gitlab website.
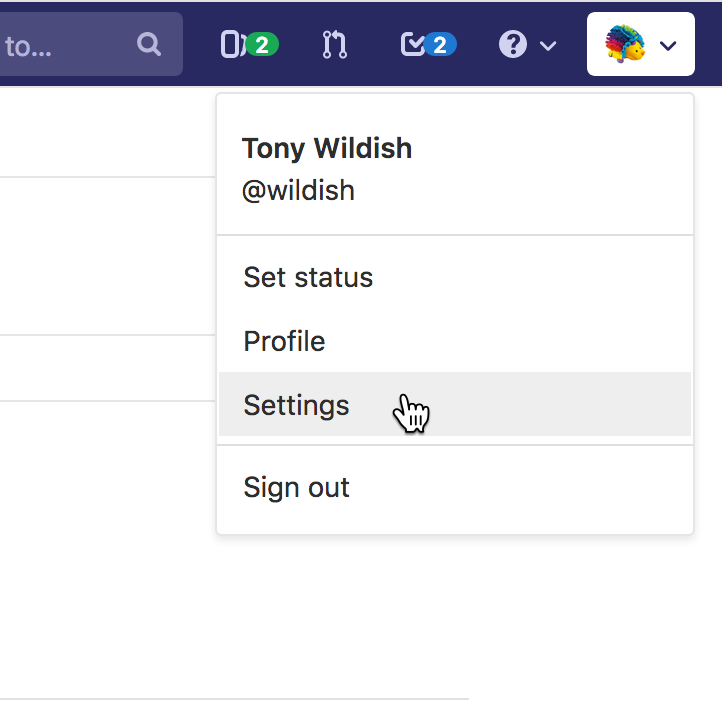
Click on your username or avatar in the top right-hand corner, and select Settings
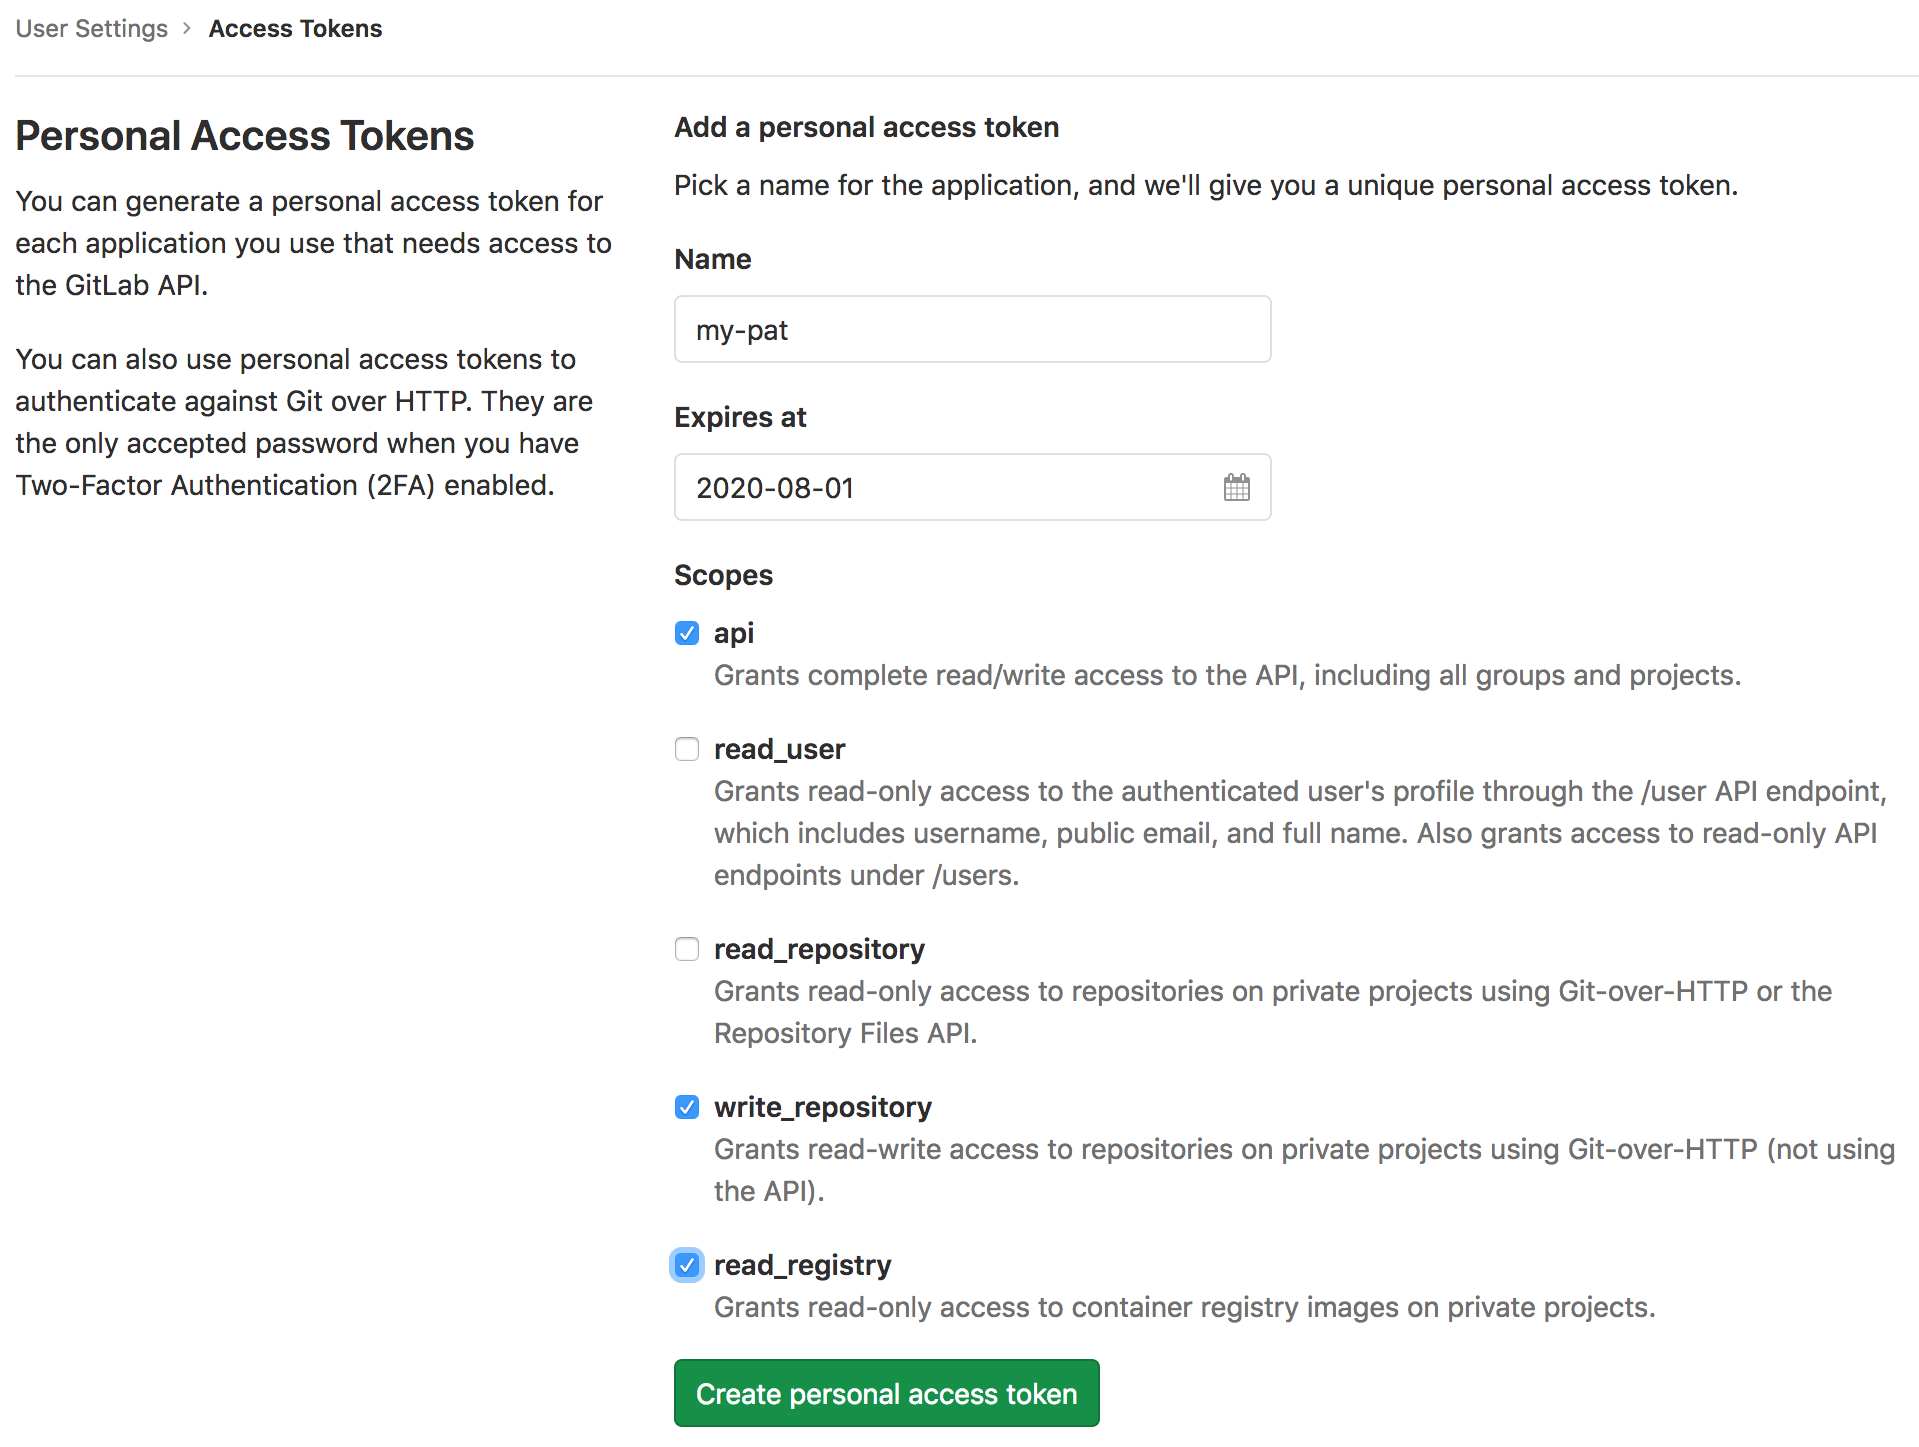
Click on Access Tokens on the navigation bar on the left, then fill in the form
- give your token a name, e.g. my-pat
- set an expiry date. One year in the future is a good value to use
- select api, write_repository and read_registry for the scope
- Then click the Create personal access token button
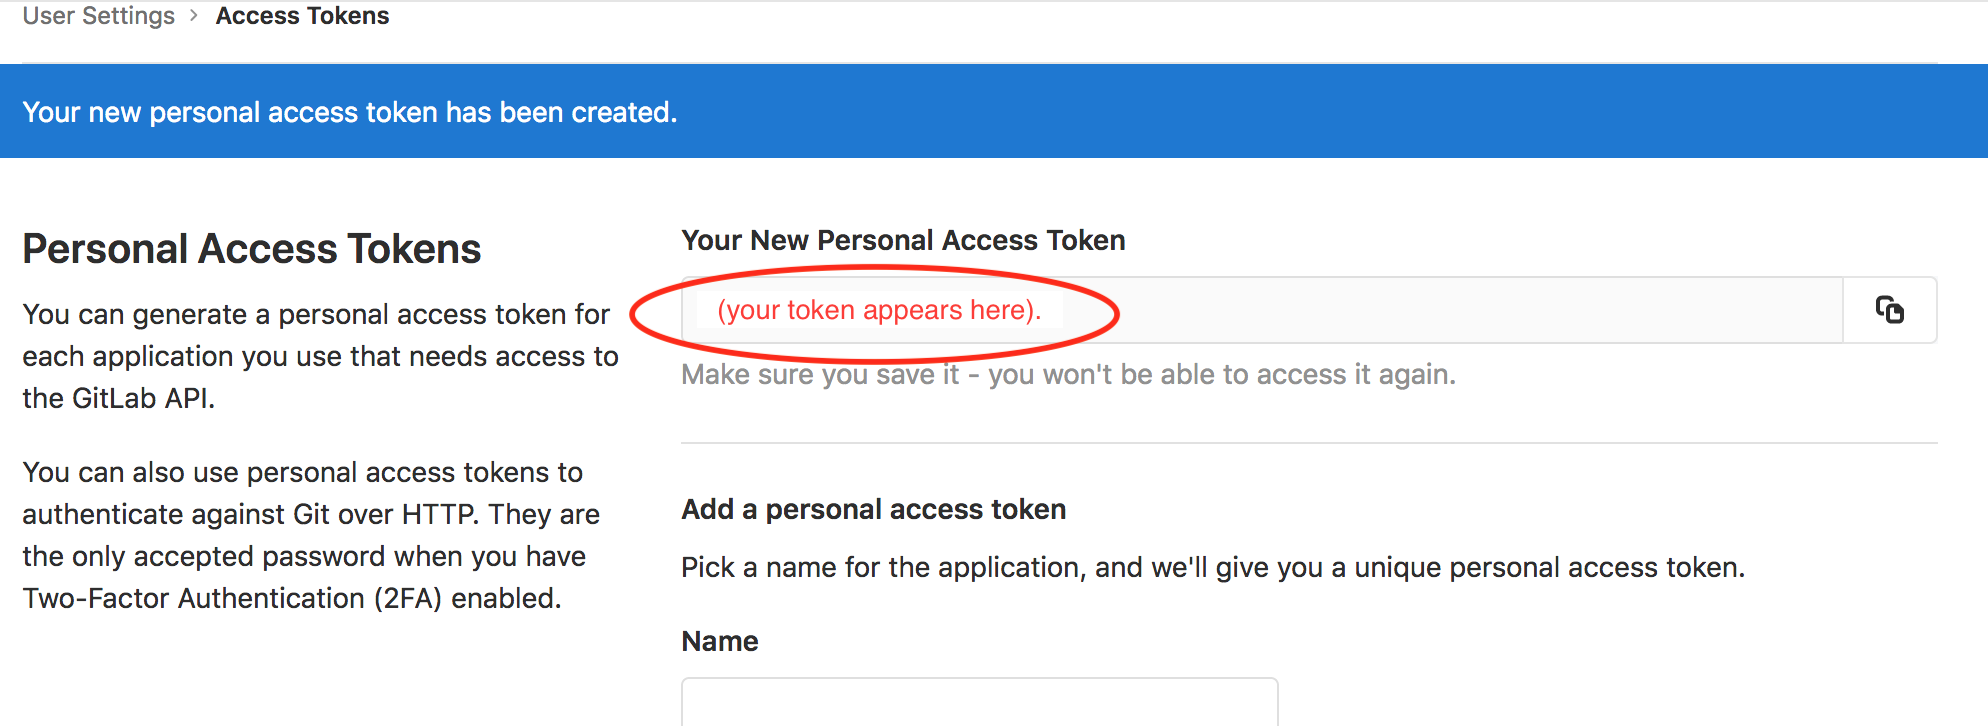
Make a note of the access token you see on the next screen, keep it somewhere safe. This is almost as powerful as your password, and should be treated with the same level of caution. If you lose it, you won’t be able to recover it from the web interface, but you can create another one easily enough.
N.B. It’s good hygiene to create separate tokens for separate purposes. That way you can revoke the access token for one use-case, if needed, without affecting others. Don’t share tokens either, the token belongs to you, not to individual projects, so giving it to someone gives them access to all your projects, not just to any one project.
It’s also important to keep track of your token expiry dates. If you’re using one in a production environment for some purpose then you’ll want to renew it before it expires.
Upload your SSH key (optional!)
This is another useful way to help you avoid having to type in your password every time you commit code to your projects. However, SSH access to gitlab.ebi.ac.uk is only available via the EBI network, not from outside, so its usefulness is a bit limited. Also, you will need to know how to use an SSH agent to cache your password. Google has a number of tutorials on that. We won’t be using the SSH protocol in these exercises, to ensure that they work the same on gitlab.com and gitlab.ebi.ac.uk, so this step is optional.
Click on your username or avatar in the top right-hand corner, and select Settings
Click on SSH Keys on the navigation bar on the left
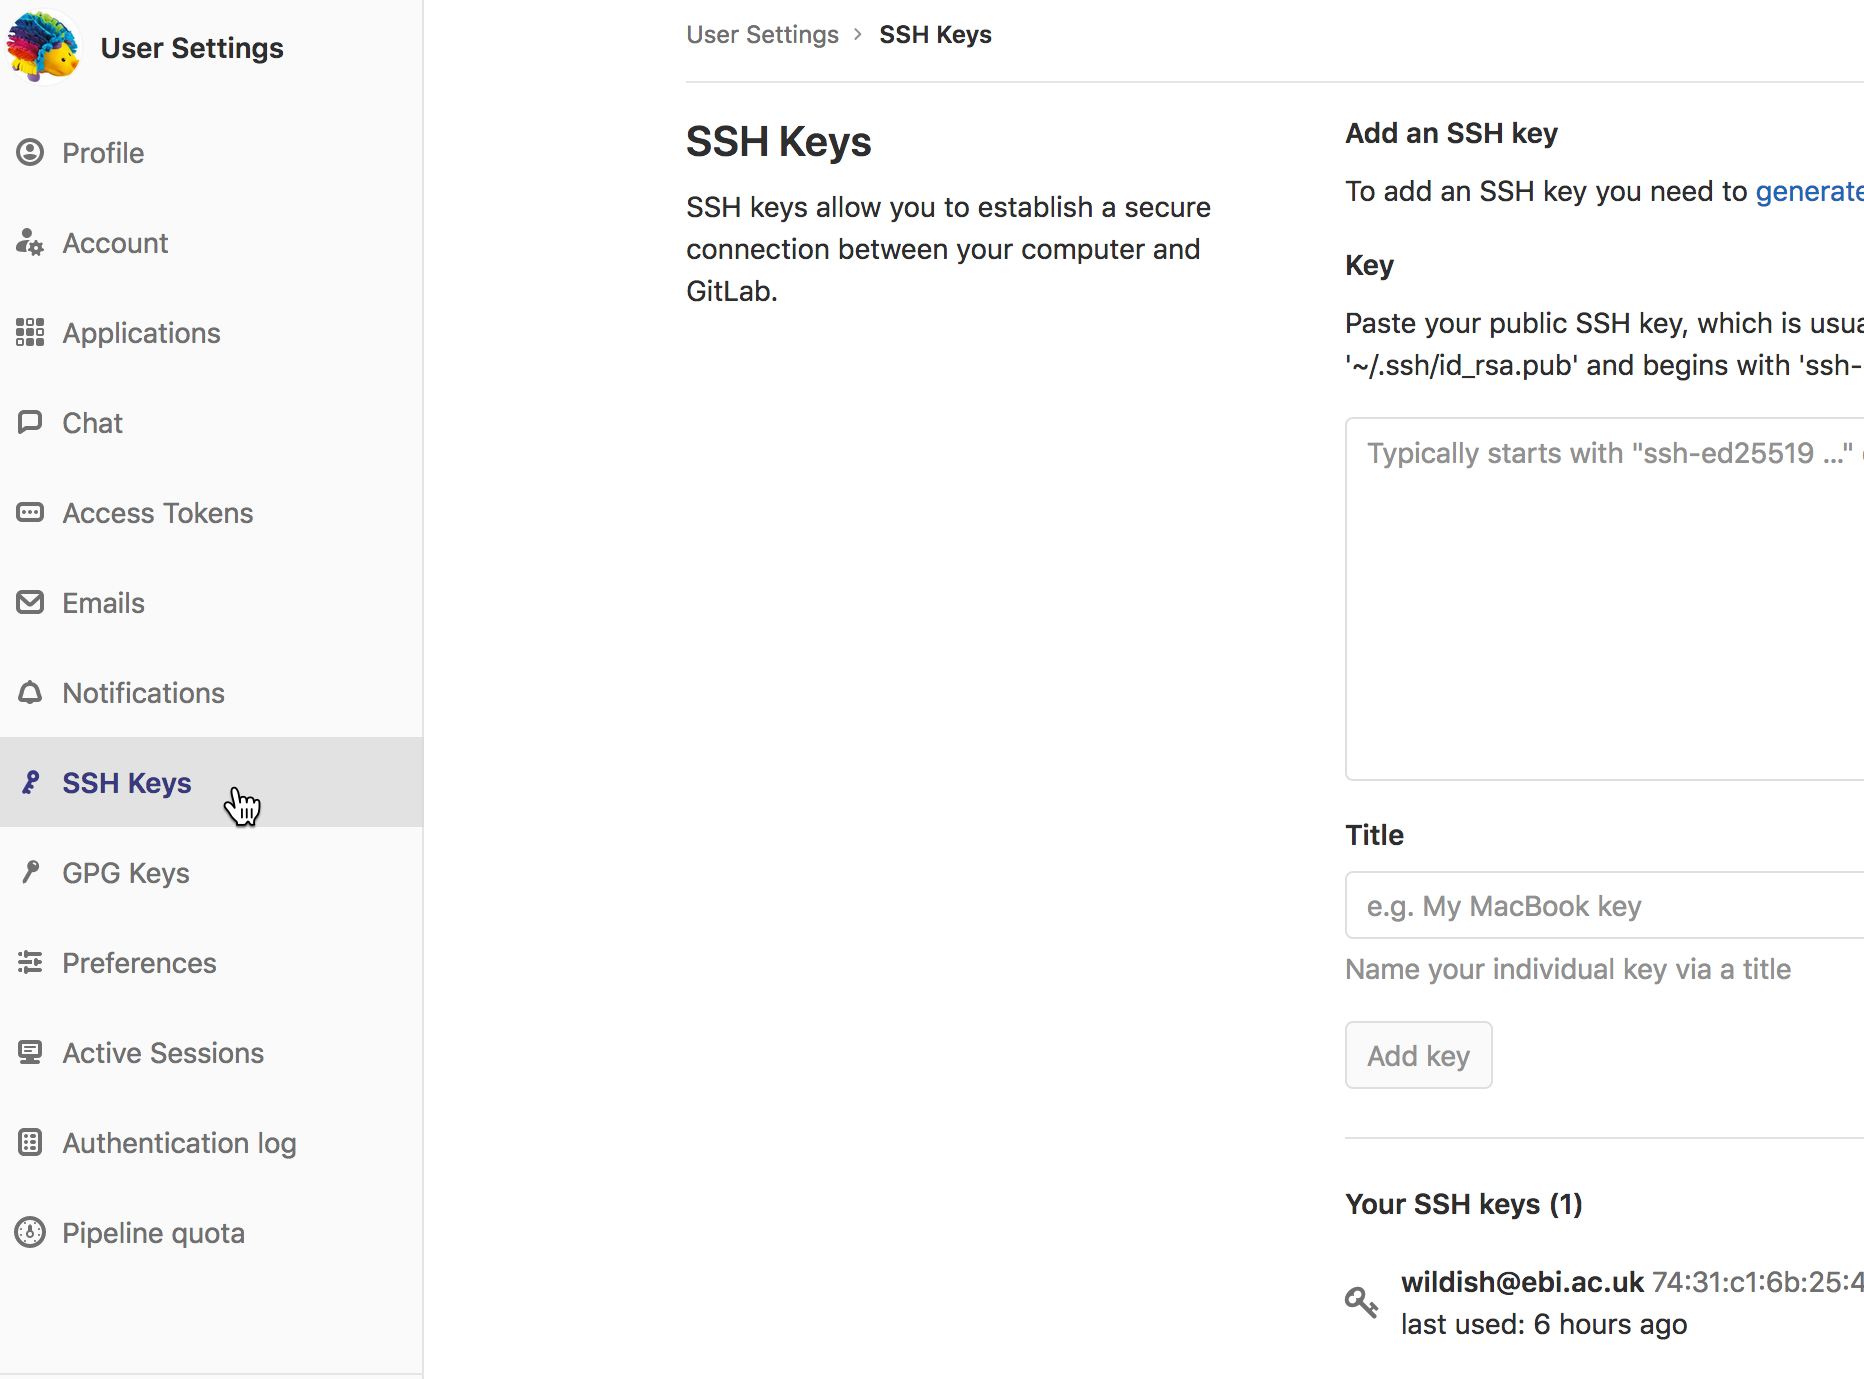
Follow the instructions on the right to upload your public SSH key. Not your private key, only the public one!
Configure email notifications (optional!)
You can control the email notifications you get from gitlab in great detail. Here’s how to customise them:
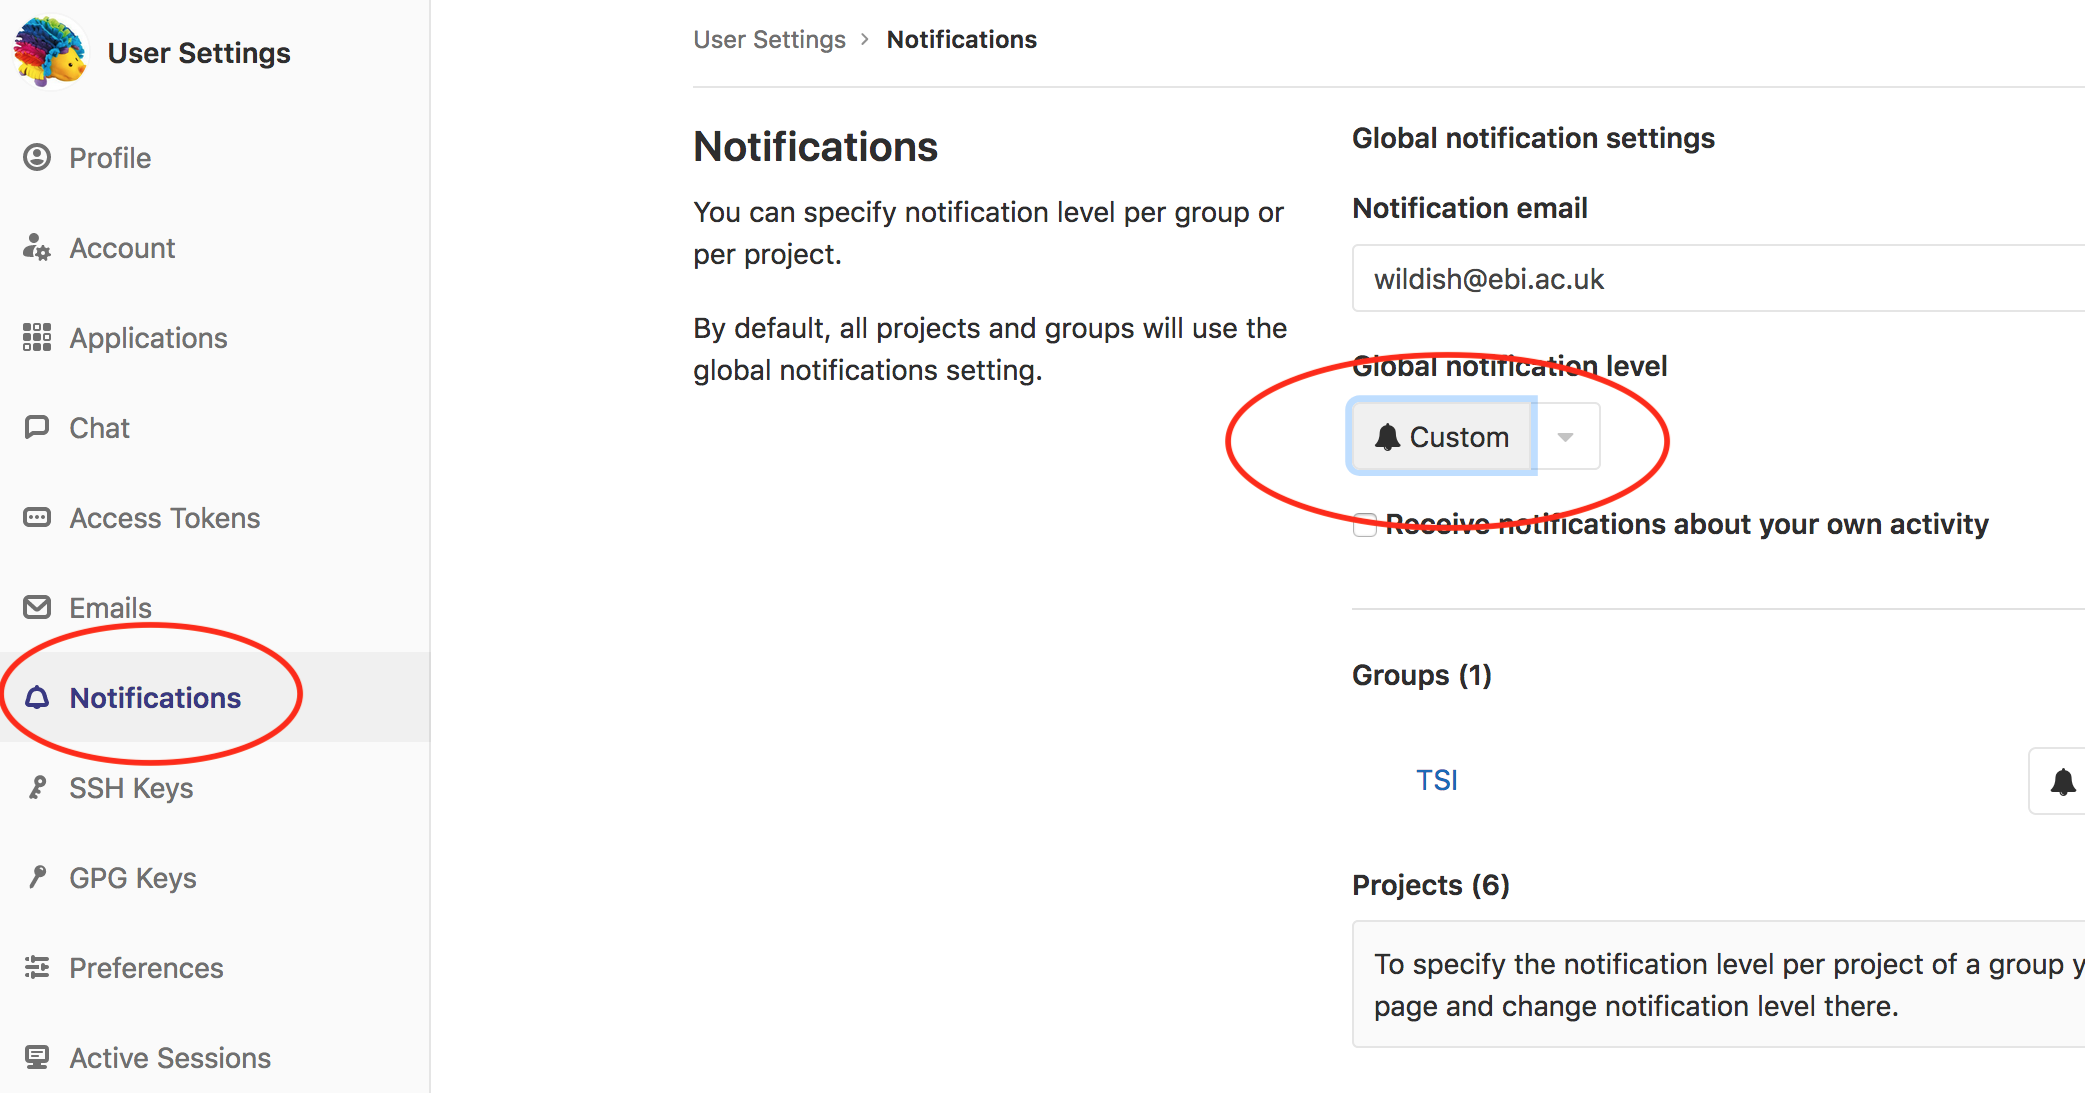
Click on your username or avatar in the top right-hand corner, and select Settings
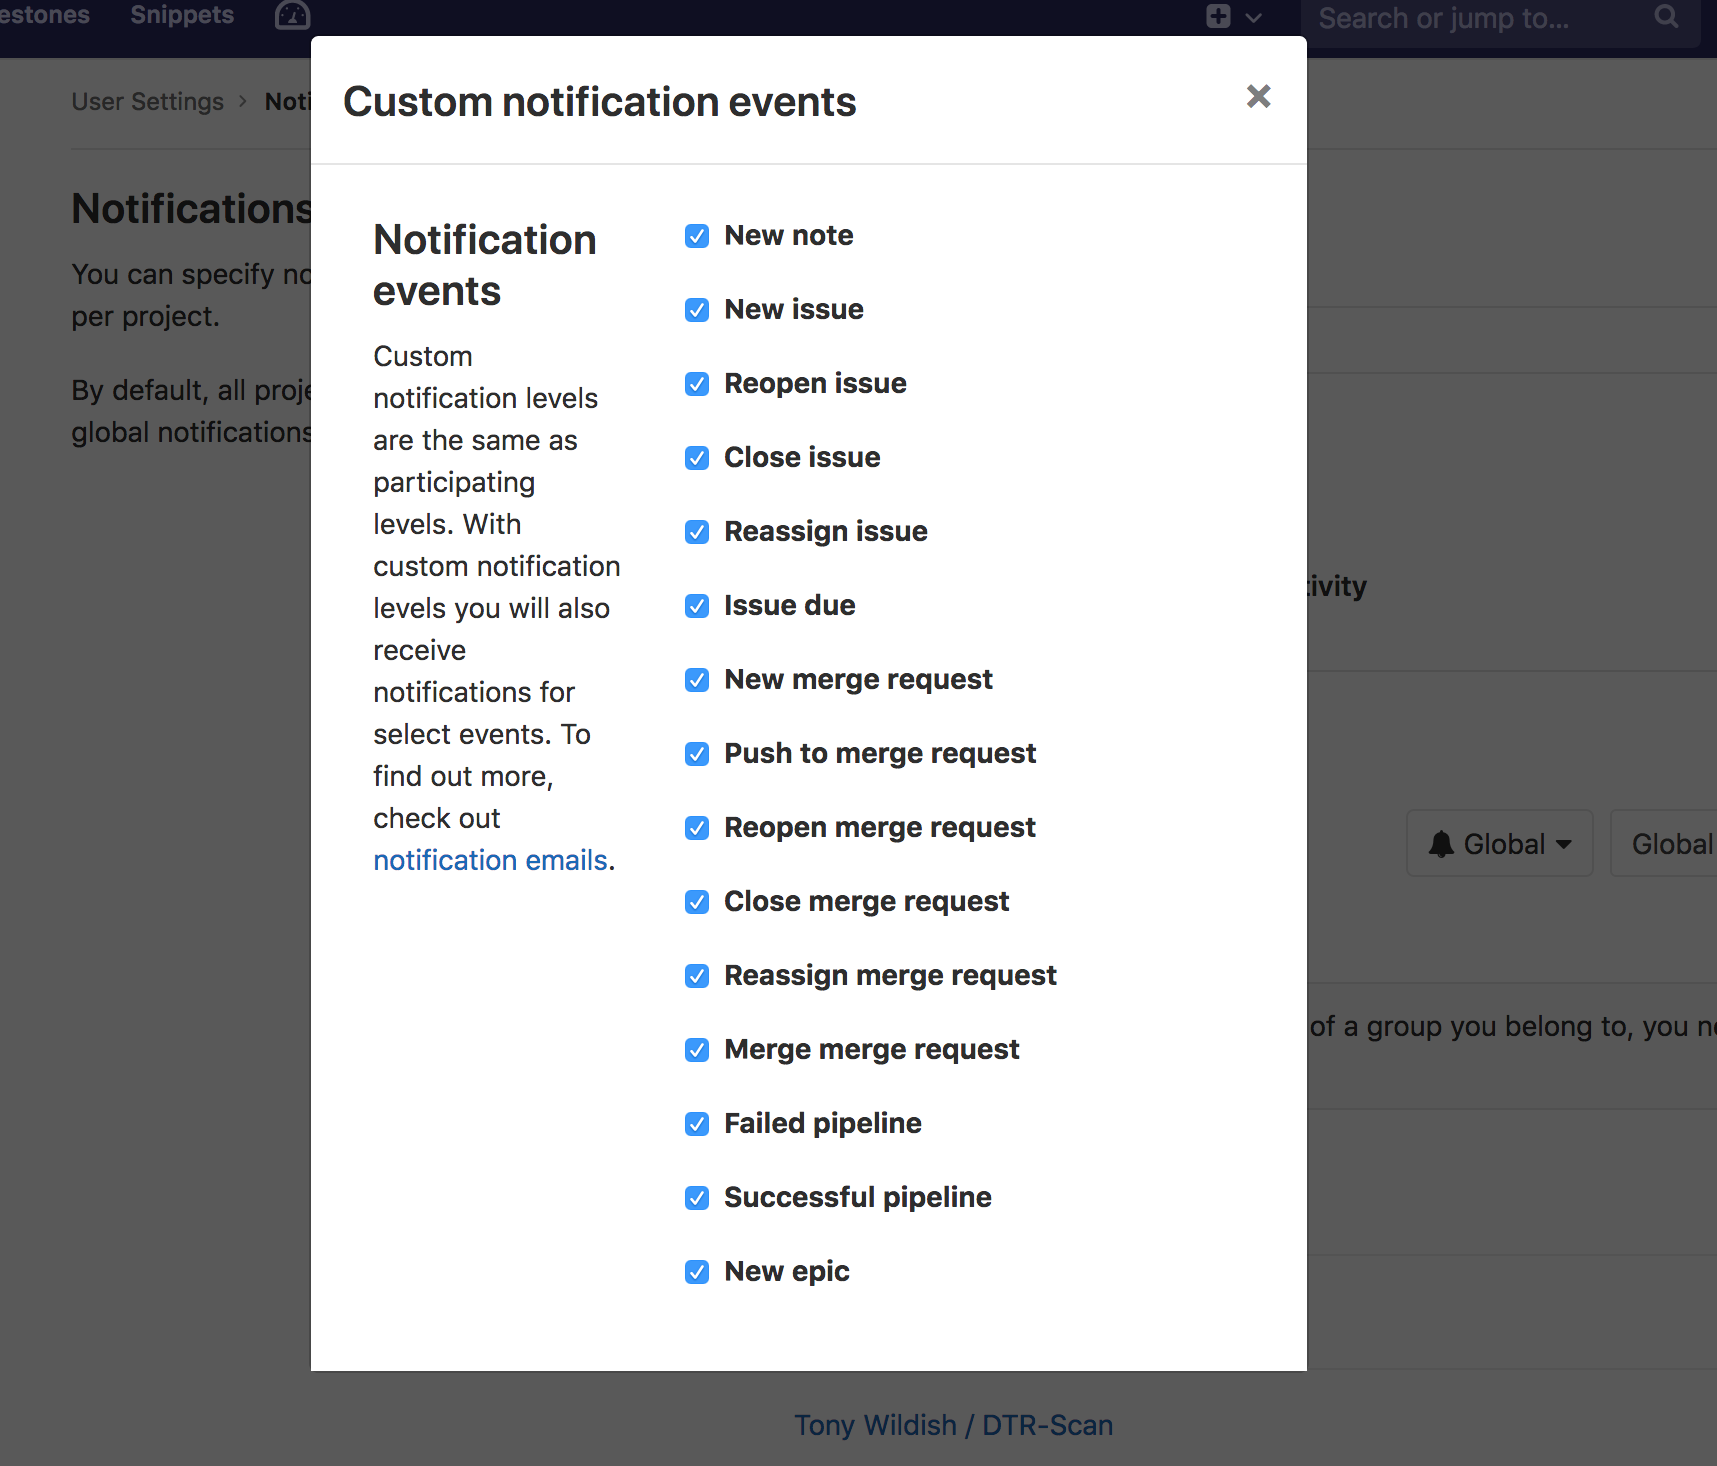
Click on Notifications on the navigation bar on the left, then on the button under Global notification level
Check any/all boxes that might interest you. I’ve checked all mine, and will uncheck as/when I decide I don’t want to get notifications anymore.
Elsewhere on the page you’ll see that you can choose at the Group or Project level which set of notification presets you want for that group or project.
That’s it, you don’t need to save the options, they’re saved automatically.
Conclusion
You should now be able to push to your gitlab repositories without having to log in with every commit, exactly as with github and other hosting services.
You will get notification by email for any interesting events in your repositories, and can tune that as needed to control the noise.
Best Practices
Ideally you should use a different SSH key for every service (gitlab, github, bitbucket, whatever) that requires you to register with a key. This limits the damage if ever one of those keys is compromised.
Likewise, use different access tokens for different purposes, with only the level of access required.